Projector Setup FAQ & Troubleshooting Guide
This page is designed to assist clients in setting up and adjusting projector rentals.
Projector FAQ
Why is my image distorted?
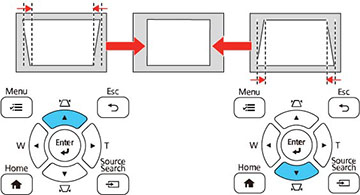
Depending on the position of the projector, the image may seem distorted at times. The projector’s ‘keystone’ function can adjust this. A projector’s keystone buttons are used to adjust the shape of an image
that is not rectangular
Please select ‘menu’ and select ‘keystone’ to adjust the image. Some of the projector has a keystone button along with the other buttons
If the image is straight but appears to be uncentred, try adjusting the ‘image shift’ by clicking ‘menu’ and selecting ‘image shift’.
Why is my image blurry?
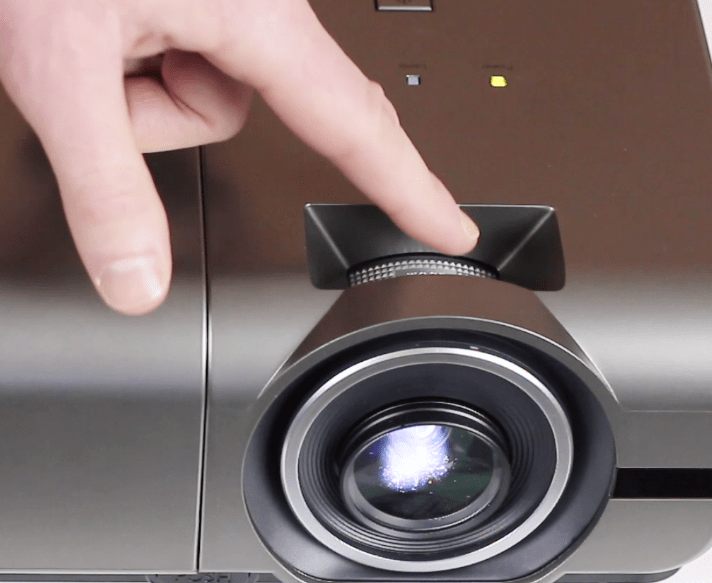
It is likely your projector is out of focus. You may use the focus wheel located at the front of the projector to adjust the zoom and focus the projector. If you’ve focused your projector, but the image is still blurry, try adjusting ‘image sharpness’ in by clicking ‘menu’ and selecting ‘image sharpness’ to make the image sharper.
I plugged in the projector, but there’s nothing on the screen.
Please follow the steps below.
- Make sure the lens cap is removed and nothing is blocking the projector.
- Unplug and replug all the cables, and check that the cables are plugged in tightly.
- Click ‘source’ on the projector to search for a connection. If it doesn’t work, try manually setting the input source. When you click on ‘source’, the screen will show all the display options your projector provides, such as VGA, HDMI,etc. Choose the input you are using. For example, if you are using a VGA cable, make sure your source is set at VGA instead of HDMI.
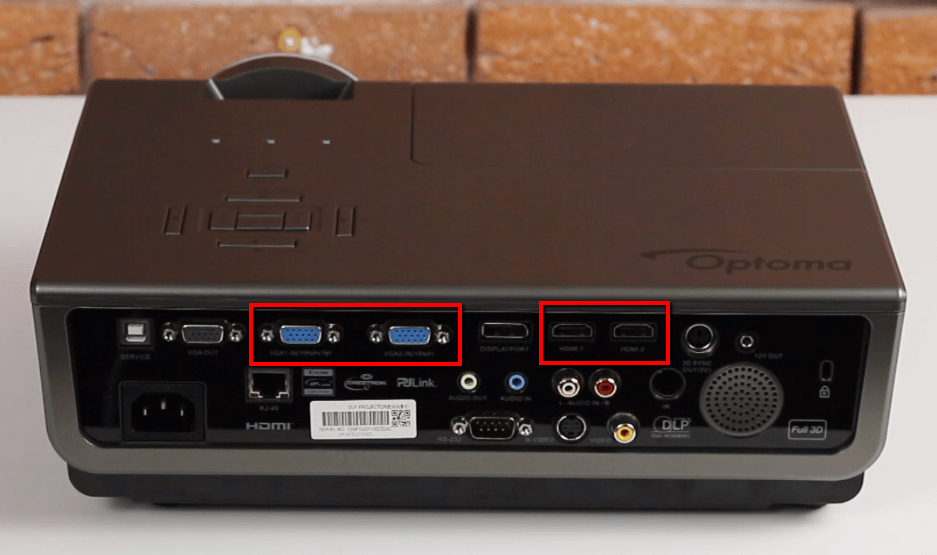
- If possible, try another port (this goes for the projector as well as the computer)
- Please check your computer’s display setting at control panel/preference settings. Make sure that the setting is set to ‘mirror display’
- Reboot the projector and your computer
TIP For Windows users, this can be done with Windows key+p
For Mac users, this can be done with Command+F1
If you want to use the projector as an extended screen, set the display setting to ‘extend’
Why can’t I see the images clearly on the wall?
Try adjusting the ‘contrast’ in the ‘menu’. All our projectors have a sufficient lumen, however, If you are using the projector in a room or situation that is brighter than you anticipated, you can always give us a call so we can try to provide you with a brighter (higher lumen) projector (extra charges may apply).
How do I connect the projector to a sound system?
Depending on the model, you may use an AUX cable to connect a sound system to the projector. This can be done by connecting the device’s ‘audio out’ to the projector’s or sound system’s ‘audio in’. Please note that projectors are not meant for high-quality
audio output. If you require higher volume and quality sound output, contact us so we can provide you with an external audio system.
Check the instructions for audio system setup for more help.
Flipping the picture on the projectors for rear or ceiling projections
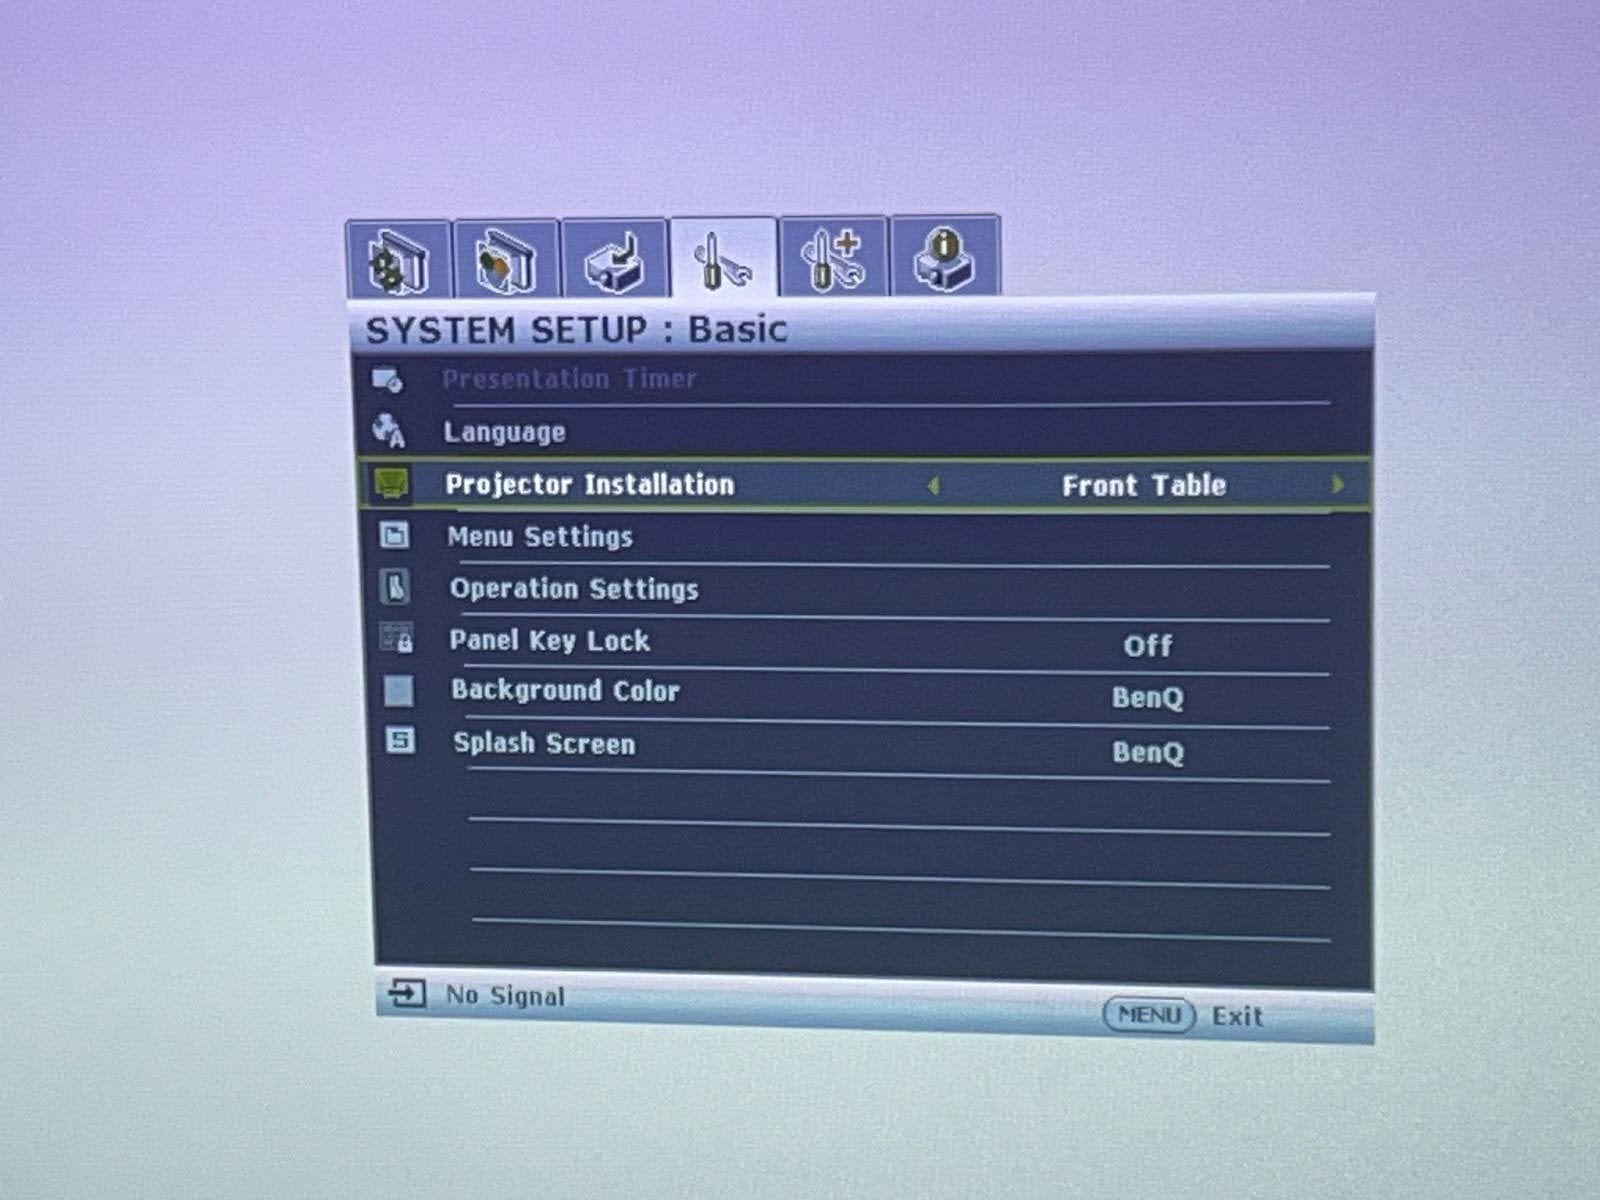
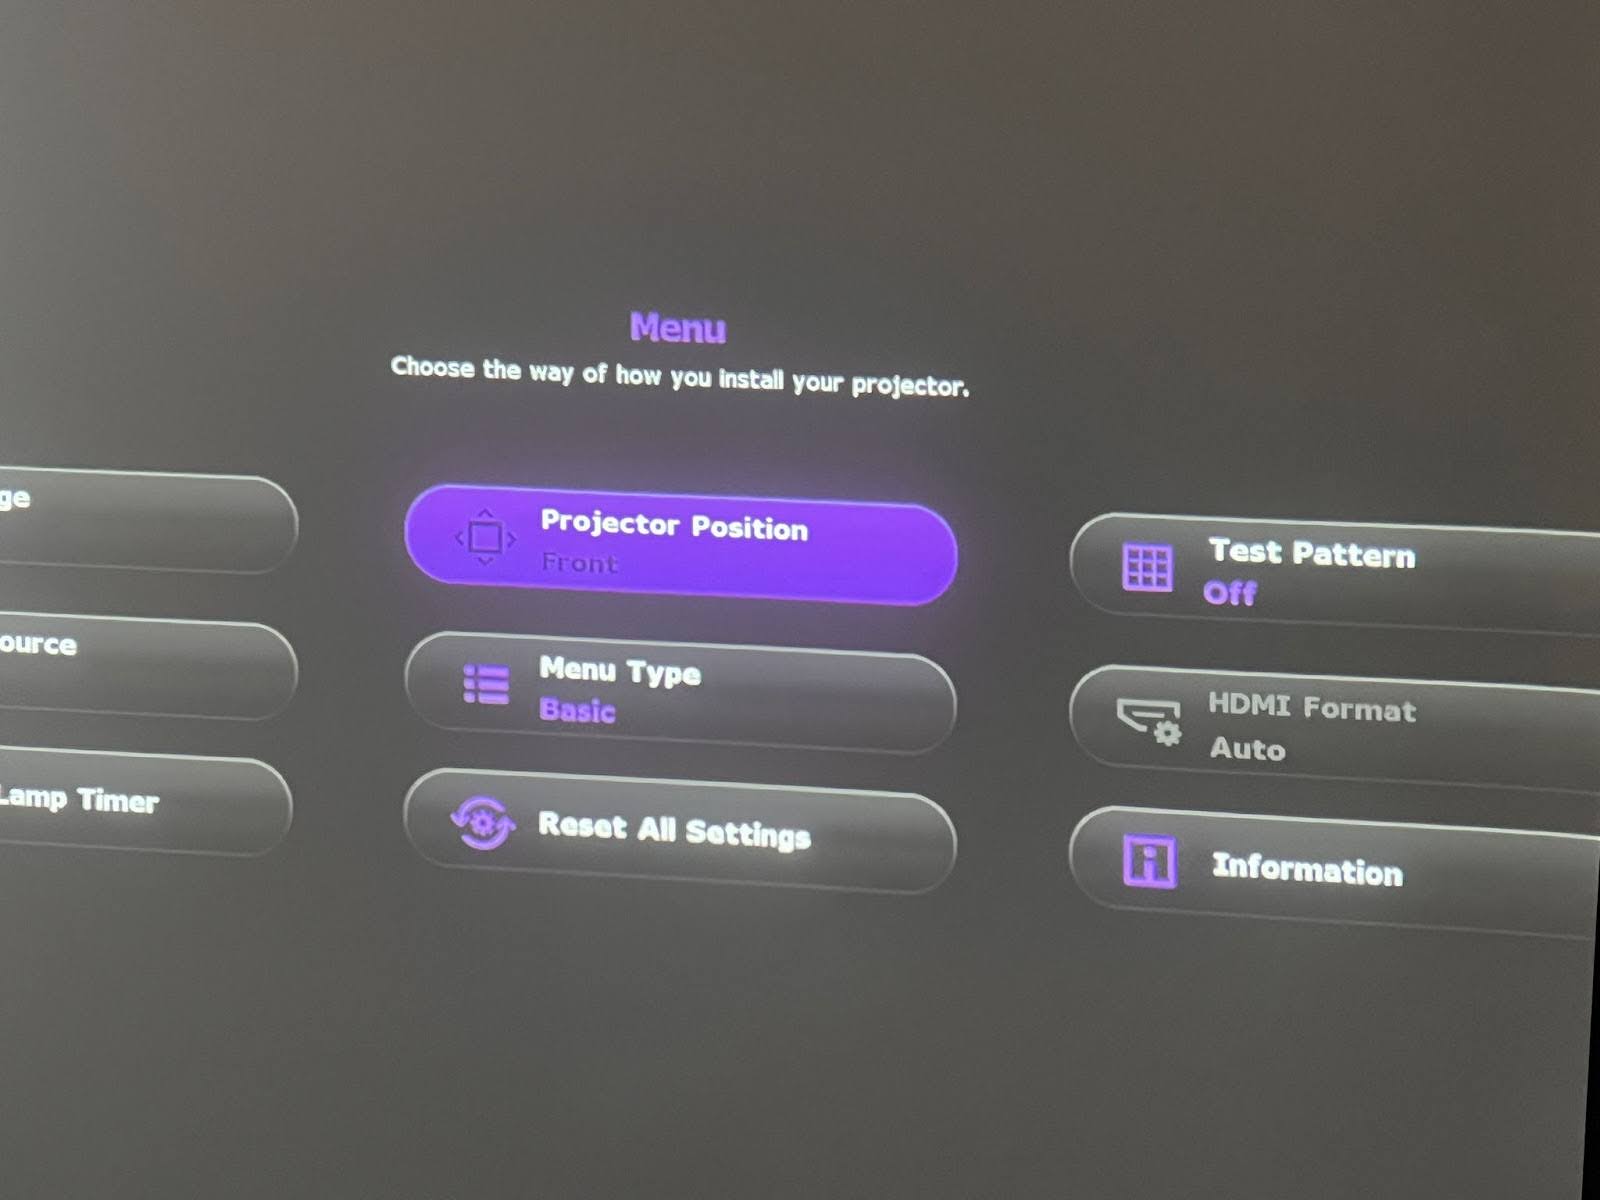
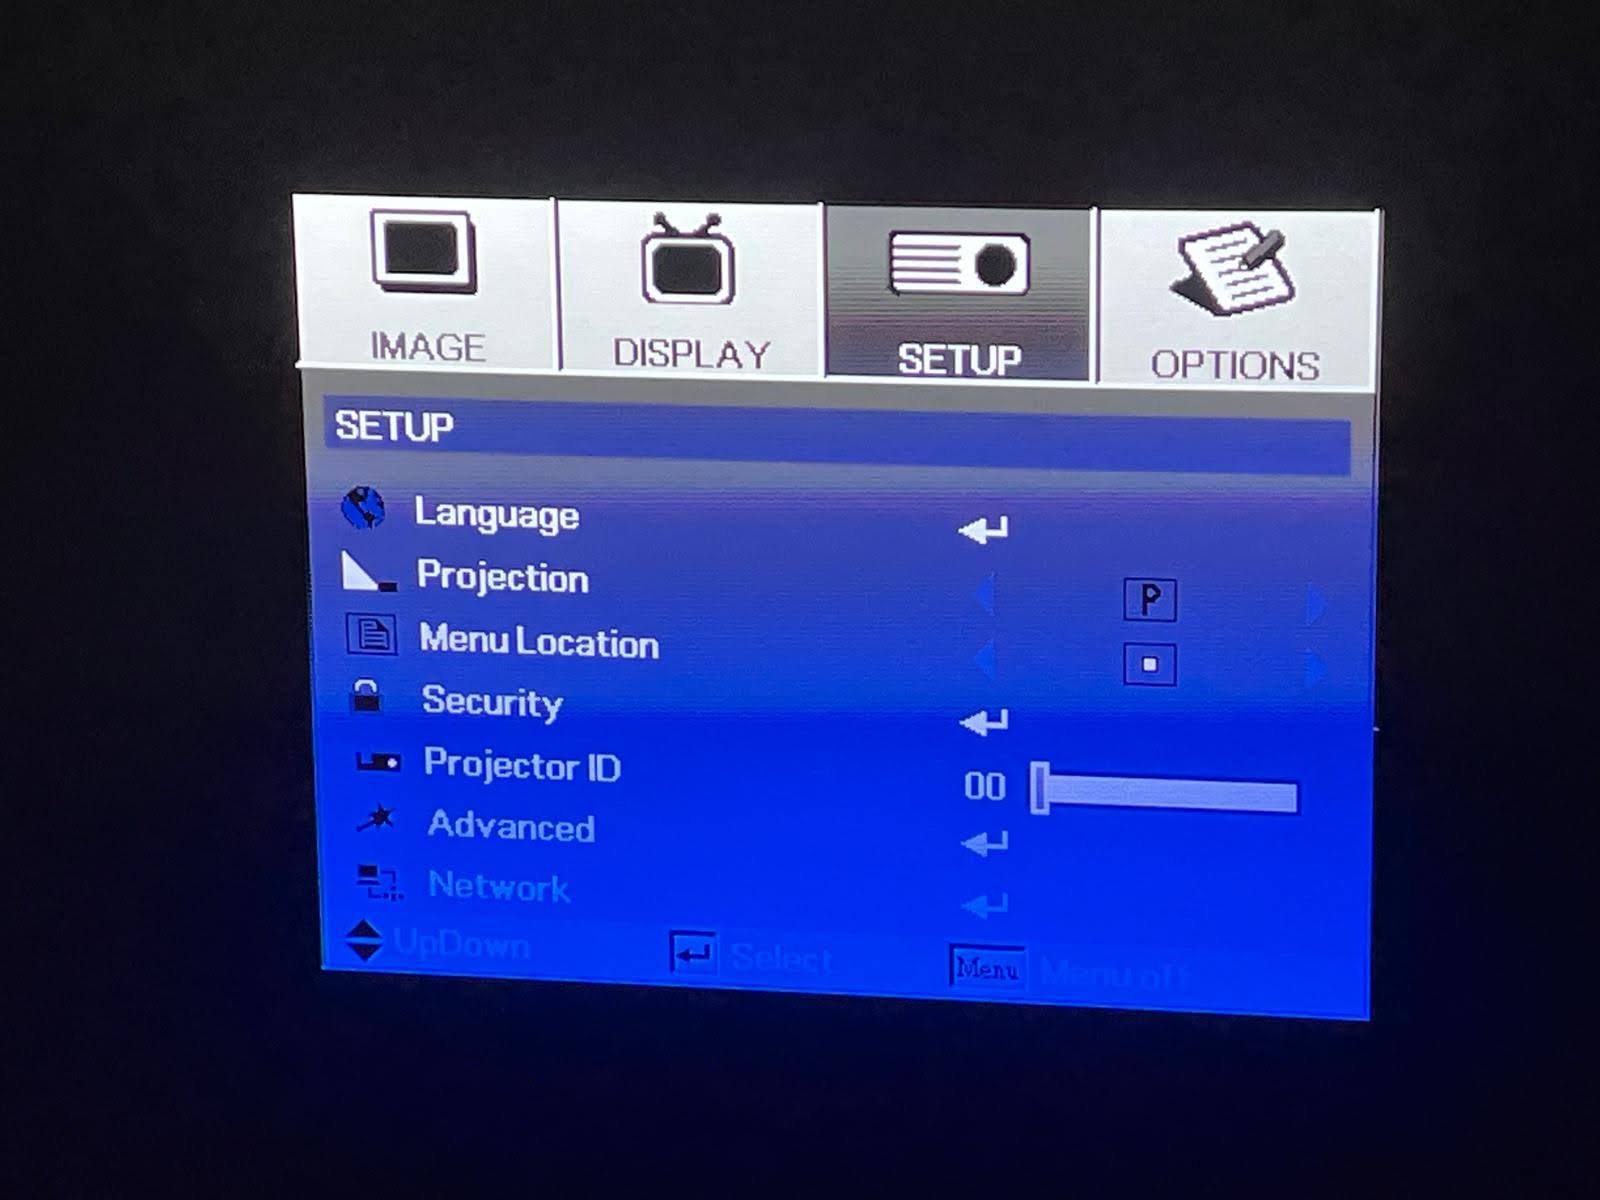
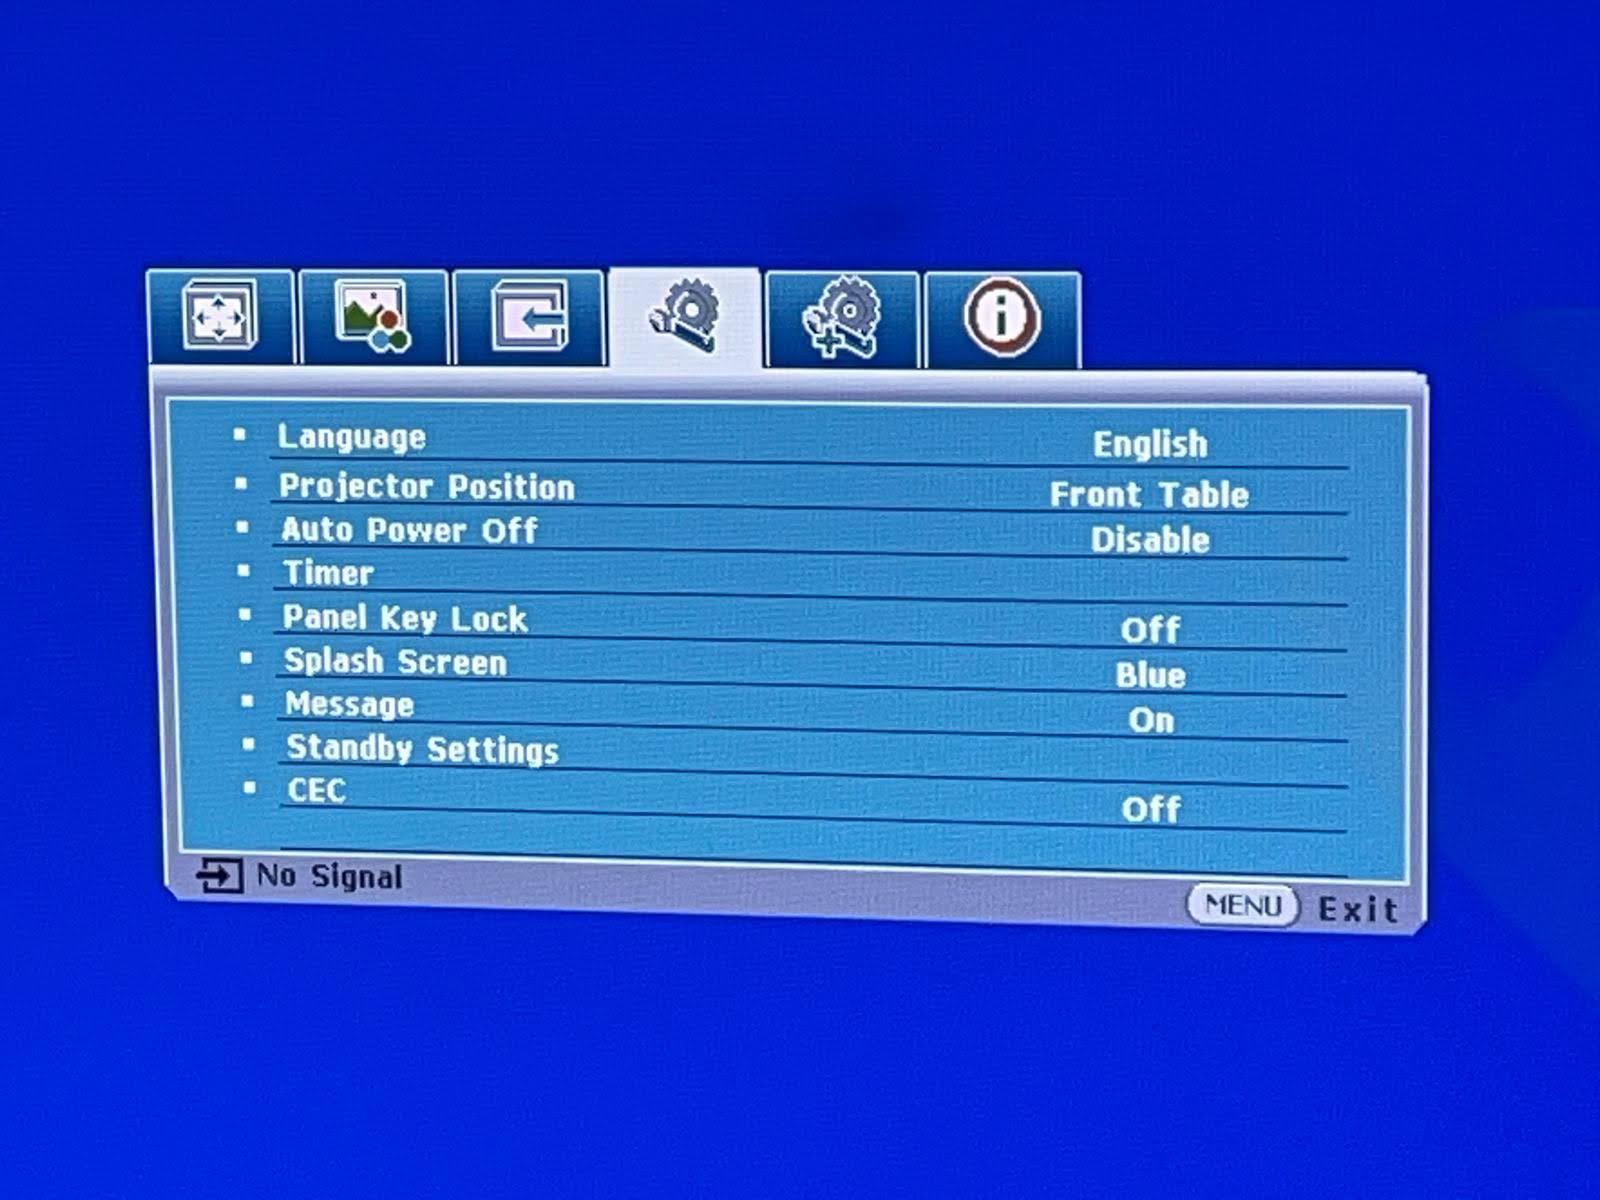
When using the projector with a rear projection screen, hanging it from the ceiling, or in both situations, you may need to adjust the image orientation. Here’s a step-by-step guide on how to do this.
PS: Please reset the image position before returning the projector.
Follow these general steps to change the projection mode:
- Turn on the Projector and Open the Menu
- Power on the projector and press the “Menu” button on the projector or remote to access the main settings.
- Navigate to the Setup or System Tab
- Use the arrow keys to navigate to the “Setup”, “System”, or “Extended” tab, depending on your projector model. This is where most projector settings are located.
- Find the Projection Mode or Position Option
- Within the selected tab, look for an option labeled “Projection Mode,” “Projector Position,” “Projection,” or “Projector Installation.” This option may be in different tabs depending on the model, but it’s usually under a setup-related category.
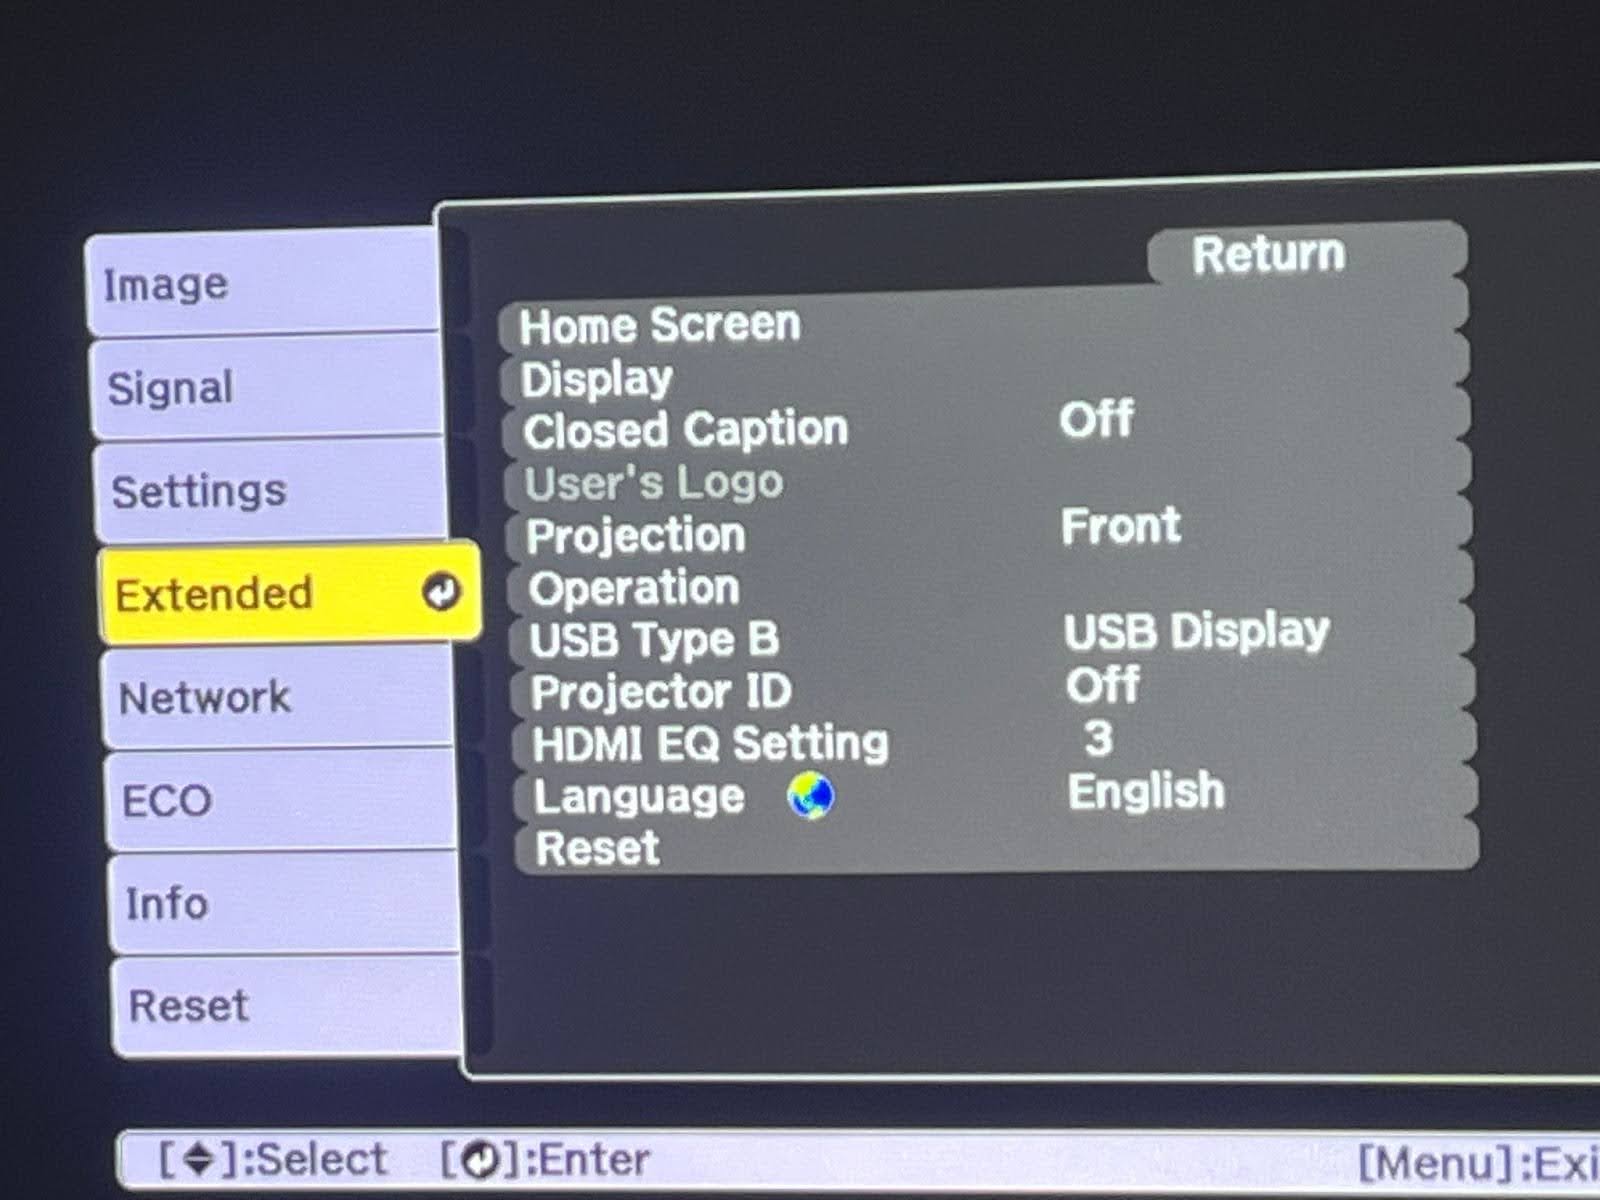
- Select the Preferred Projection Mode
- Choose the projection mode that suits your setup. You’ll typically see options such as:
- Front: Standard front-facing setup.
- Rear: For rear projection through a translucent screen.
- Ceiling Front: For mounting the projector on the ceiling facing forward.
- Ceiling Rear: For mounting the projector on the ceiling for rear projection.
- Choose the projection mode that suits your setup. You’ll typically see options such as:
- Save and Exit
- Confirm your selection, save your changes if prompted, and exit the menu. Your projector should now display the image according to the chosen setup.
Check the links below if you need help with Audio System and Projection Screen setup
- How to set up a tripod projection screen
- How to set up a fast fold screen + Dress-up Kit
- Audio system setup + projector, microphones and Bluetooth
If you need more help with other equipment setup, check the User Guide Hub

